

Effective React Performance 🚀Strategies for Faster Load Times

React apps are loved for their speed and scalability, but as your app grows, it can slow down significantly. One of the main culprits? Bloated JavaScript bundles. The result? Slow load times, frustrated users, and higher bounce rates. But here’s the good news: with optimization techniques like chunking, lazy loading, code splitting, and suspense, you can completely transform your app’s performance.
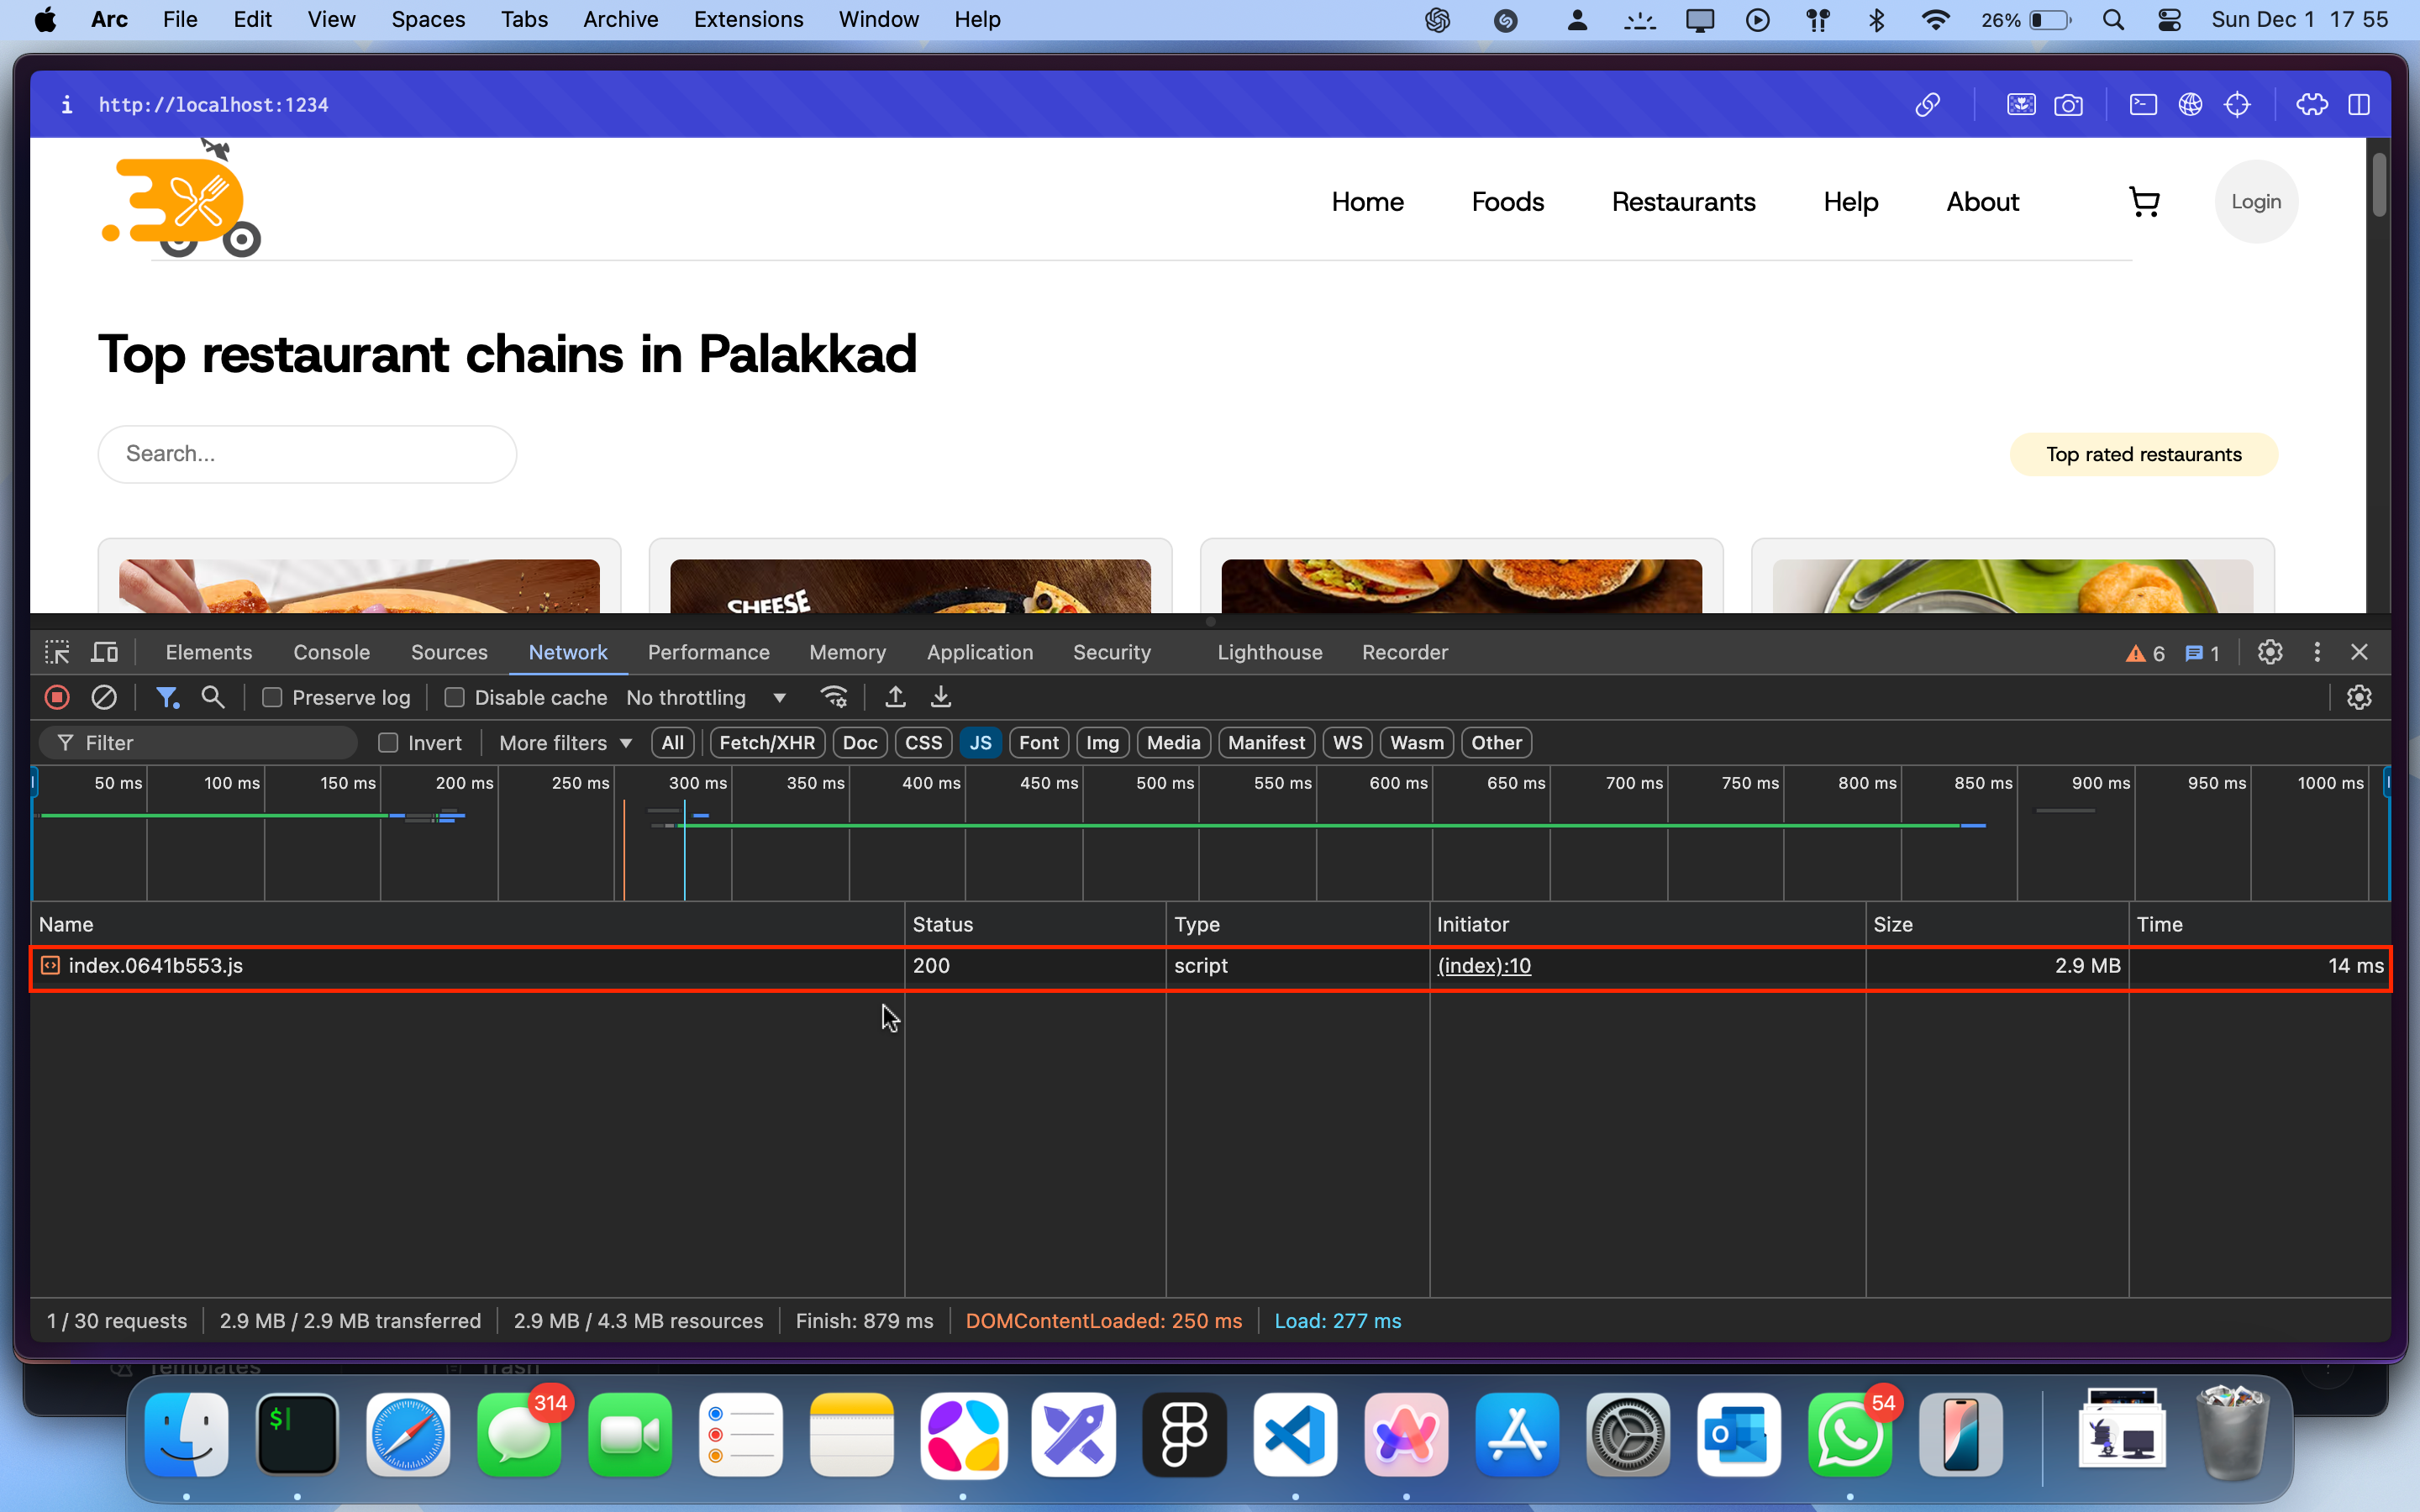
Here’s how bad things can get before optimization:
⚠️ Before Optimization:
Now, imagine cutting that bloated bundle size into smaller, faster chunks. Your app becomes snappy, your users stay happy, and your bounce rates plummet. Ready to dive in? Let’s go!
🌟 Why Should You Optimize Your React App?
Optimizing React apps isn’t just about impressing users—it’s a win-win for both you and your audience. Here’s why:
👉 Better User Experience: Say goodbye to long waits and hello to happy users.
👉 Lower Bounce Rates: Fast-loading apps keep users engaged and sticking around.
👉 SEO Perks: Google loves speed, so your optimized app can climb the rankings.
👉 Mobile-Friendly: Smaller bundles mean less data usage—perfect for users on the go.
If you’re ready to boost performance, let’s jump into the how!
🛠️ 1. Chunking: Breaking It Down
Chunking splits your app’s JavaScript bundle into smaller, more manageable pieces called “chunks.” Instead of serving one giant file, your app only serves the necessary pieces when they’re needed.
✨ How It Works:
Chunking is handled by tools like Webpack. It divides your code into chunks automatically when configured.
🎯 2. Code Splitting: Load What You Need
Code splitting ensures your app loads only the JavaScript necessary for a specific page or feature. This reduces the load time for initial visits, leaving the rest for later.
👩💻 Example: Splitting Routes
React’s React.lazy and Suspense make code splitting a breeze:
import React, { lazy, Suspense } from 'react';

const RestaurantMenus = lazy(() => import('./components/RestaurantMenus'));

<Suspense fallback={<div>Loading...</div>}>
  <RestaurantMenus />
</Suspense>;
In this example:
✅ UserProfile is loaded only when the user navigates to it.
✅ <Suspense> shows a loading spinner while the component is being fetched.
⏳ 3. Lazy Loading: Load on Demand
Lazy loading delays the loading of non-essential components until the user interacts with them. This ensures that critical resources load first.
🔥 Lazy Loading with React
Let’s look at an example of lazy-loading a heavy component:
import React, { Suspense } from 'react';

const RestaurantMenus = React.lazy(() => import('./components/RestaurantMenu'));

<Suspense fallback={<div>Loading...</div>}>
  <RestaurantMenus />
</Suspense>;
👑 Why Suspense Is King
Without <Suspense>, your app might throw an error when rendering a lazy-loaded component that hasn’t finished loading yet. Suspense acts as a safety net by showing a fallback UI (like a spinner) while the component resolves.
⚡ Before and After: The Impact of Optimization
Let’s see how optimization changes the game:
Before Optimization
Single JavaScript bundle: 2.9 MB
Load time: 14 milliseconds
After Optimization:
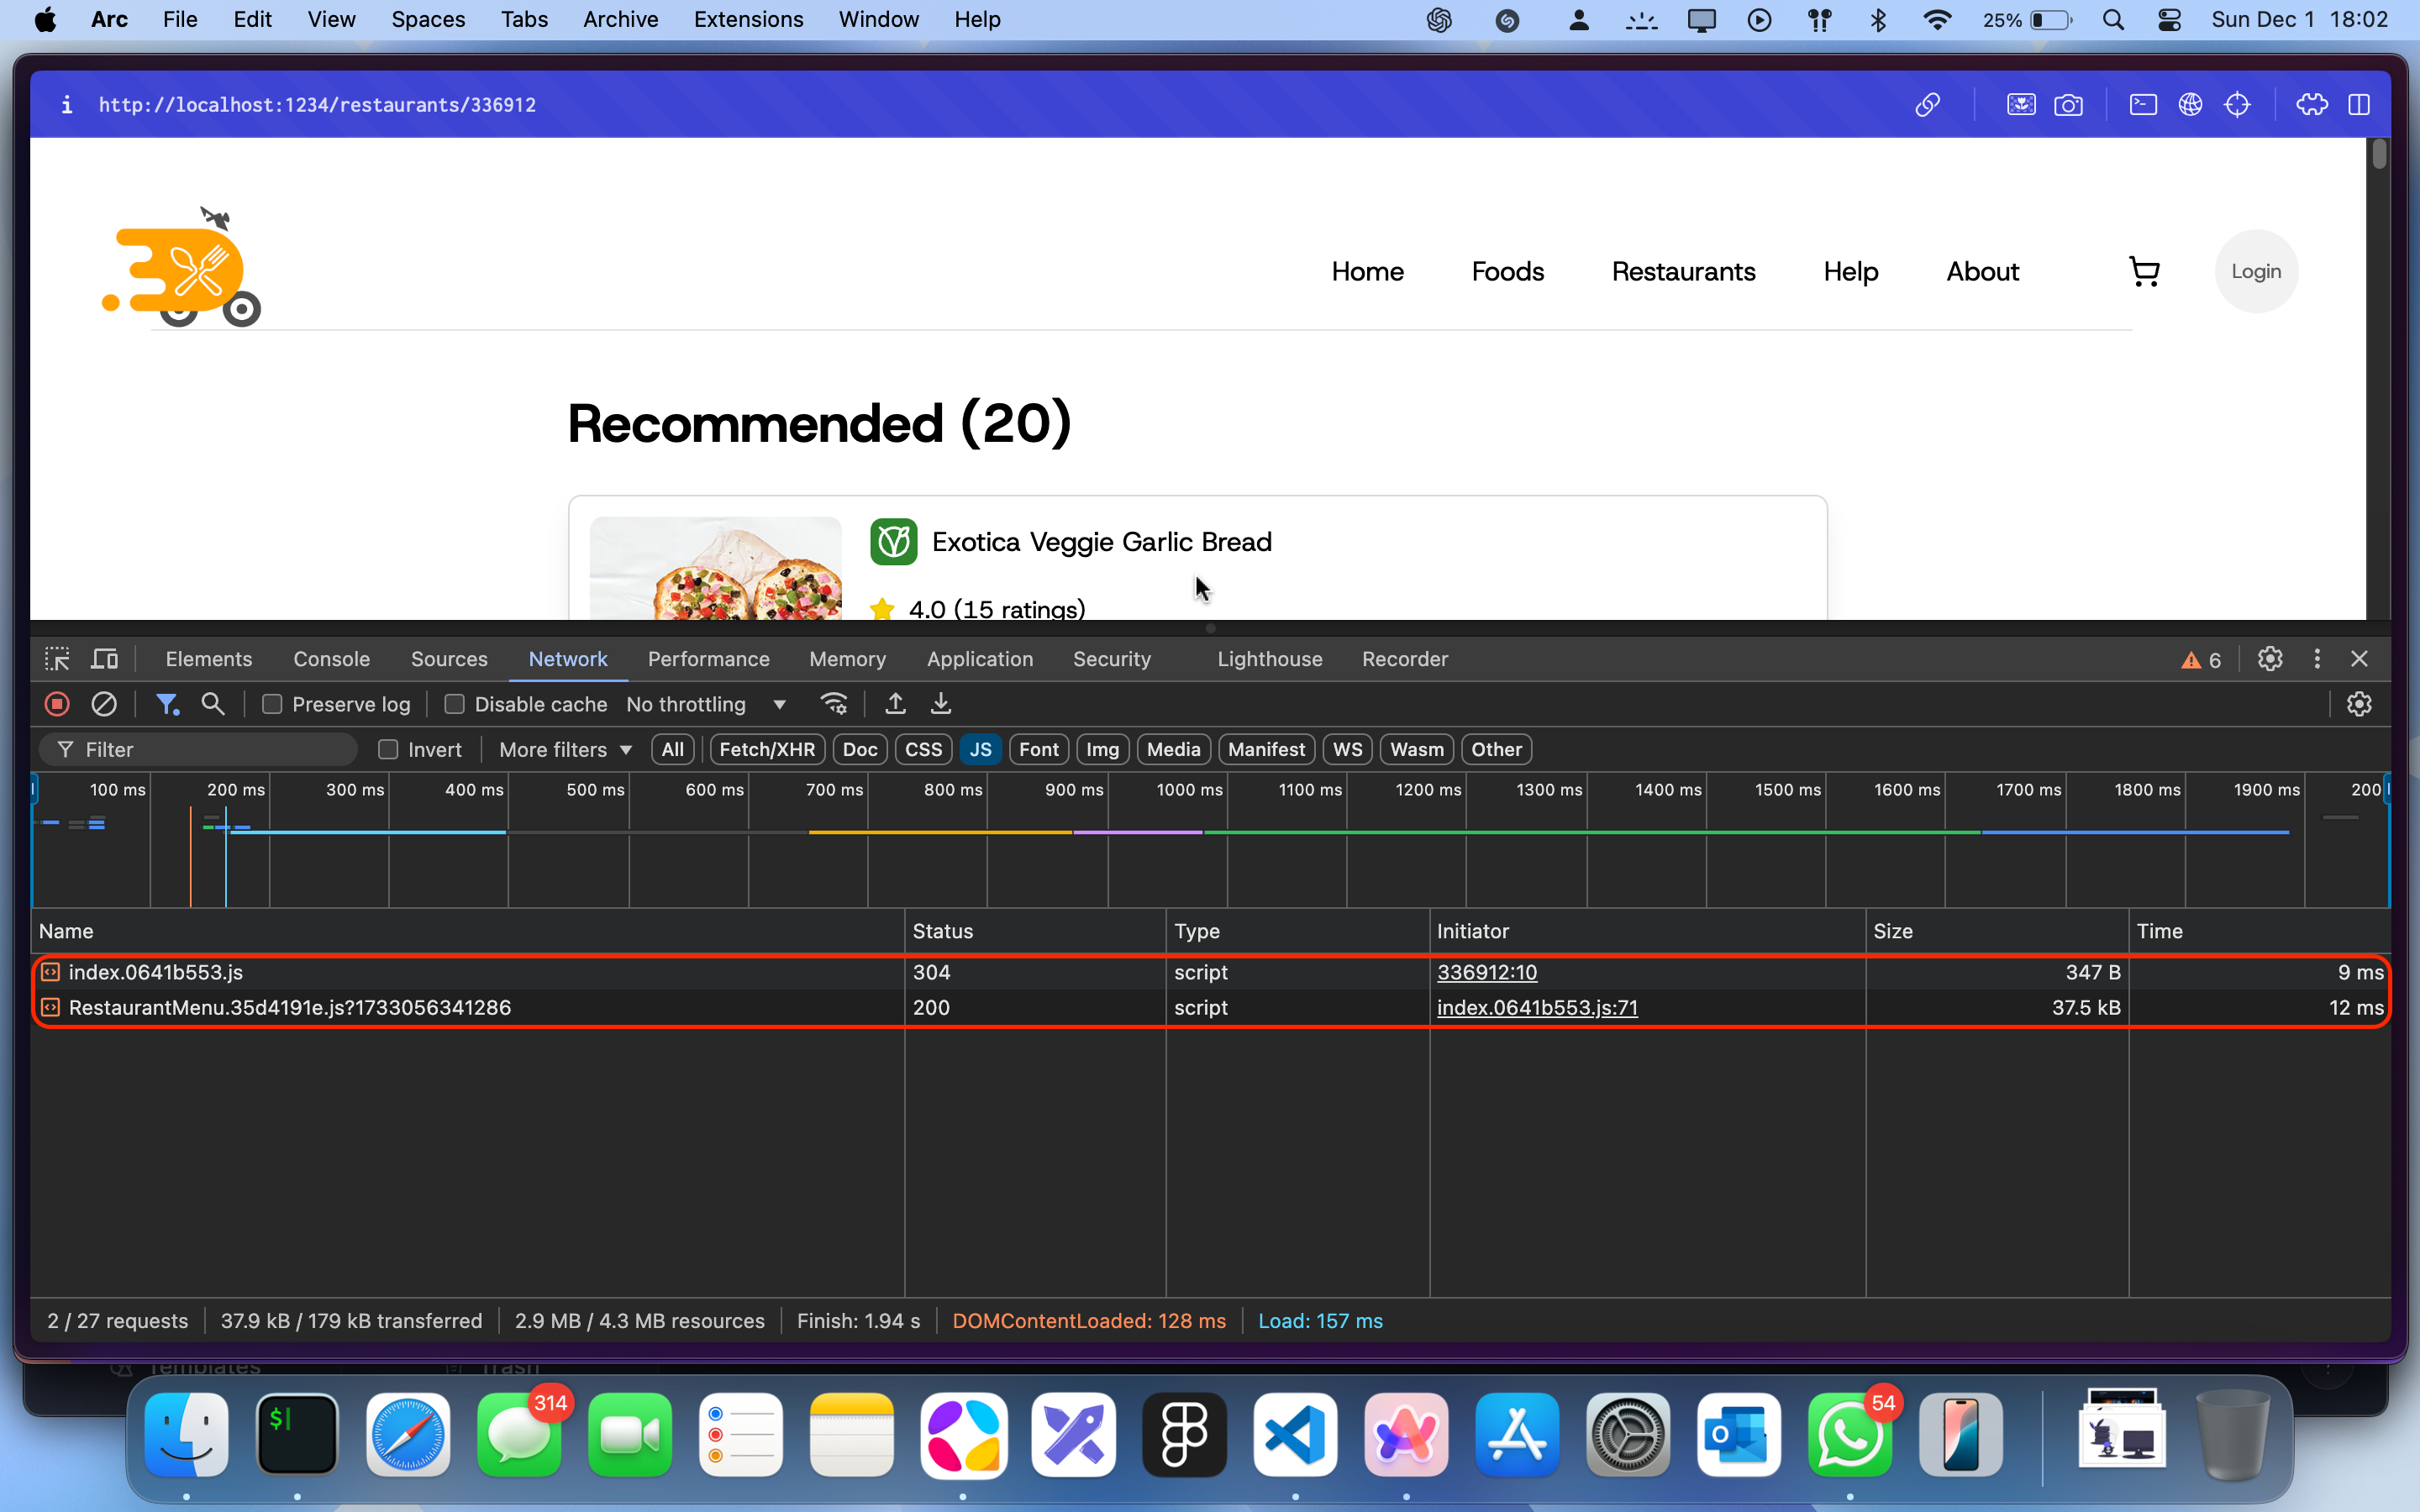
Multiple JavaScript chunks with reduced sizes
Reduced initial load time
User satisfaction: Through the roof!
Why handling the load state?
Here’s the deal: when lazy-loaded components are fetched, there’s a short delay (milliseconds) before they’re ready to render. During this time, React tries to render the component, and if it’s not fully loaded, it can throw an error.
By using <Suspense>, you:
🎯 Prevent rendering errors.
🎯 Deliver a smooth transition with a loading spinner or placeholder UI.
🎯 Keep your app polished and professional.


